LumenIO v1.0.0
Introduction
Hey! It’s been 2 years from my last post. In these years I changed company (now I’m working at Apuliasoft) and I got married with a beautiful wife. In an old post I talked about an idea of a new version of LED Controller, with wireless communication between the smartphone and the device. In these 2 years I created this new version, changing the name to LumenIO, but now I found the time to write this post. So, I’m going to explain you this new version, smaller and more beautiful than old one.
Device
Circuit
| Qty. | Component |
|---|---|
| 1 | MH-ET LIVE D1 mini ESP32 |
| 1 | LED strip RGB 5050 SMD not addressable at 12V |
| 1 | Led strip connector 4 pin |
| 1 | Led strip extension |
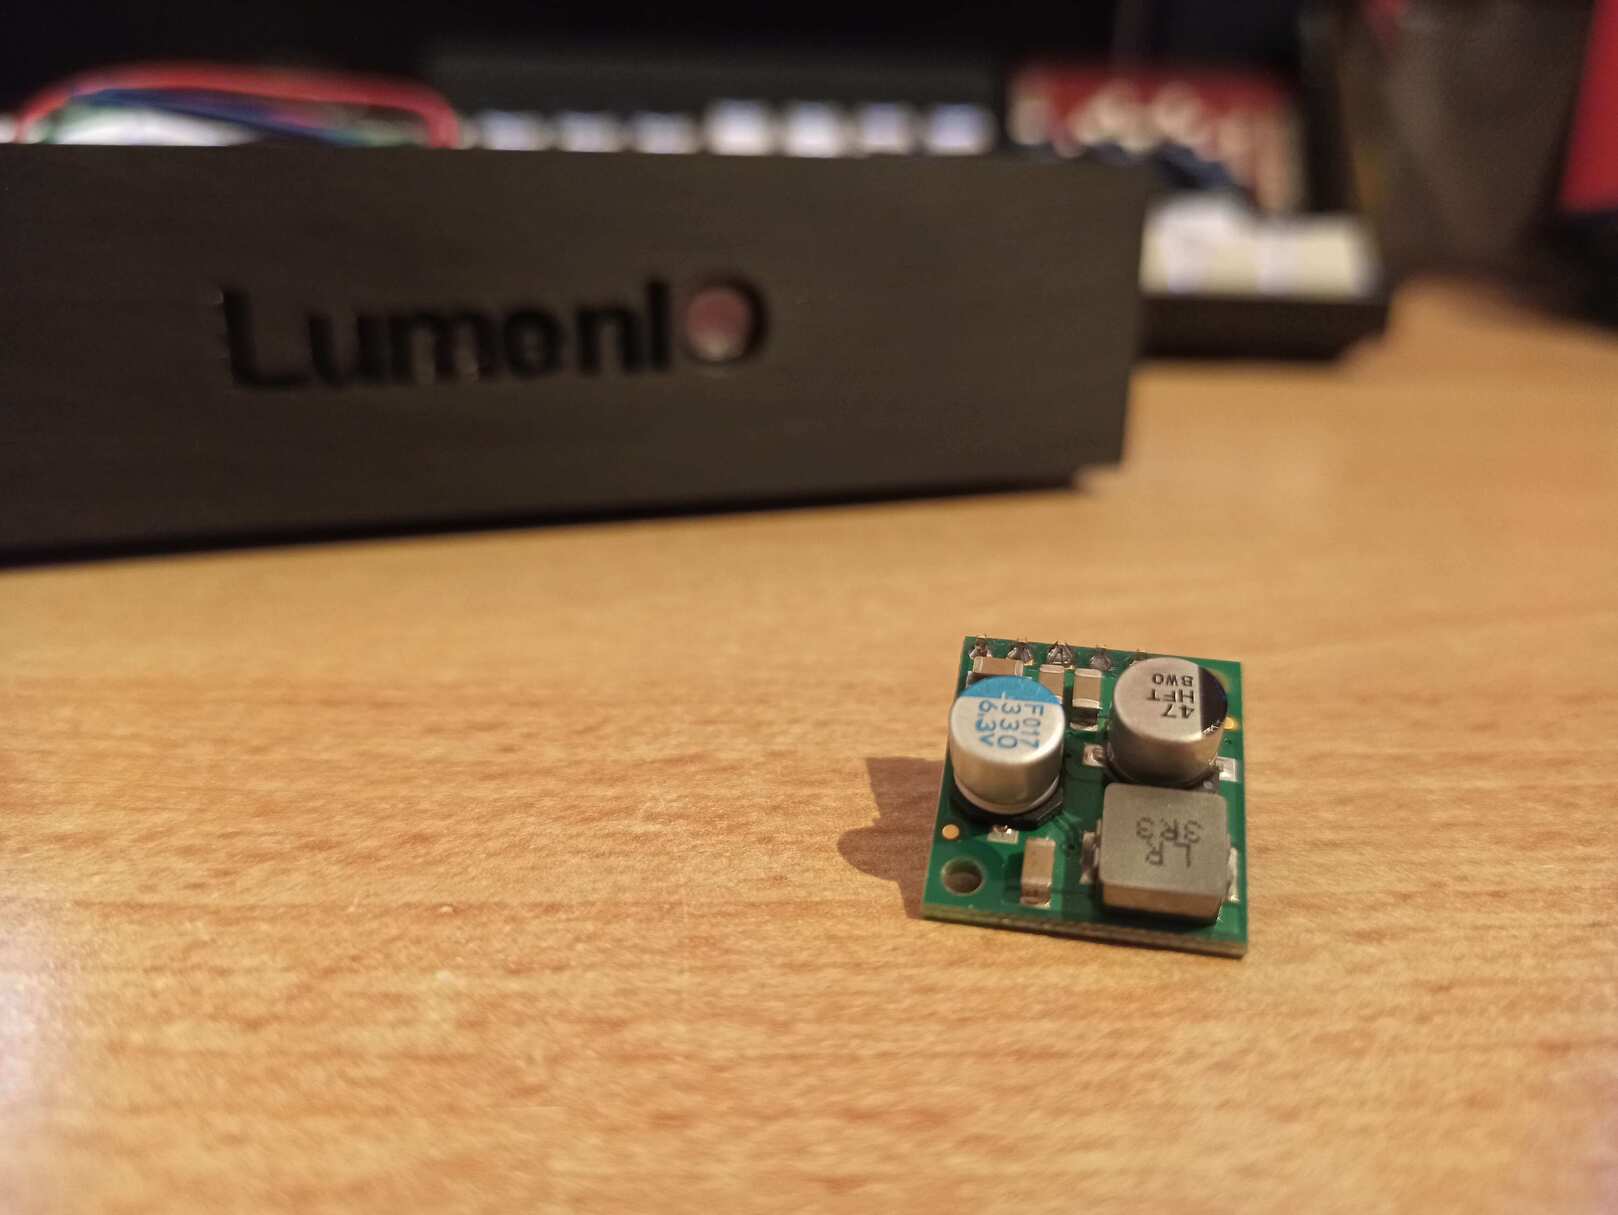
| 1 | Pololu D36V28F5 - 5V, 3.2A Step-Down Voltage Regulator |
| 3 | Transistor TIP120 |
| 3 | Resistor at 10kΩ |
| 3 | Resistor at 1kΩ |
| 1 | Red LED diode at 5mm |
| 1 | Switch SPST at 15x10x10mm |
| 1 | Female base for Power supply |
| 1 | Power supply at 2A, 12V |
| undef. | Wires both for 2A and 100mA of electrical current |
For the circuit I decided to use a matrix board.
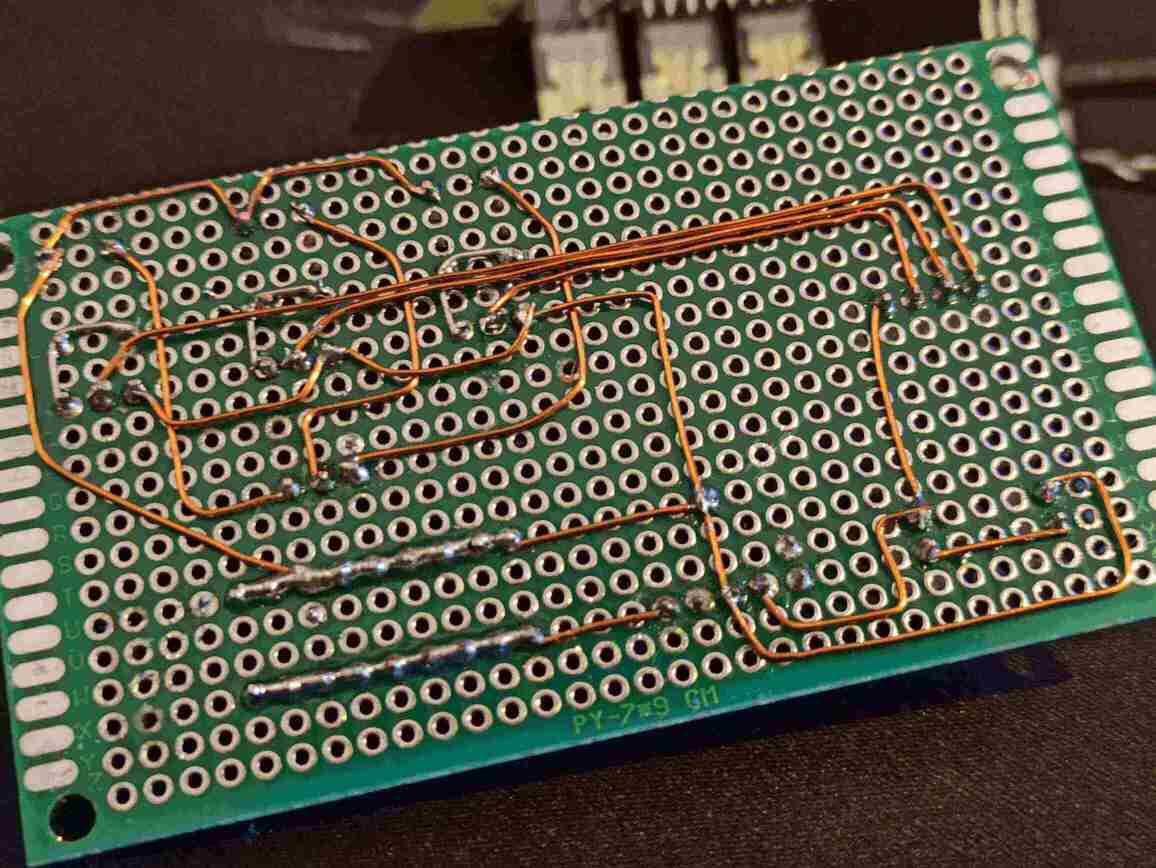
The electric scheme is like the previous project, without buttons and rotatory encoders: is a black box with only RGB and power supply connection.
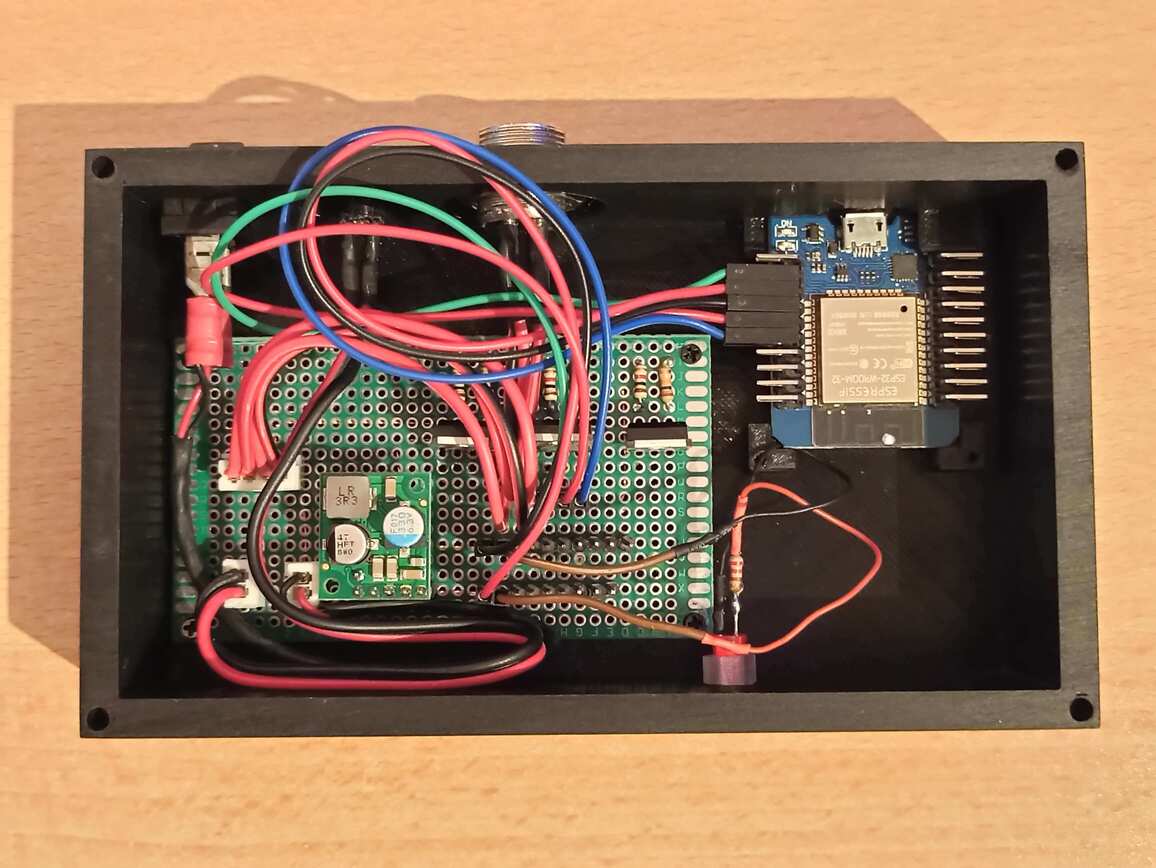
The MCU is now supplied by the Pololu D36V28F5 with its more precision and current intensity, compared to L7805.
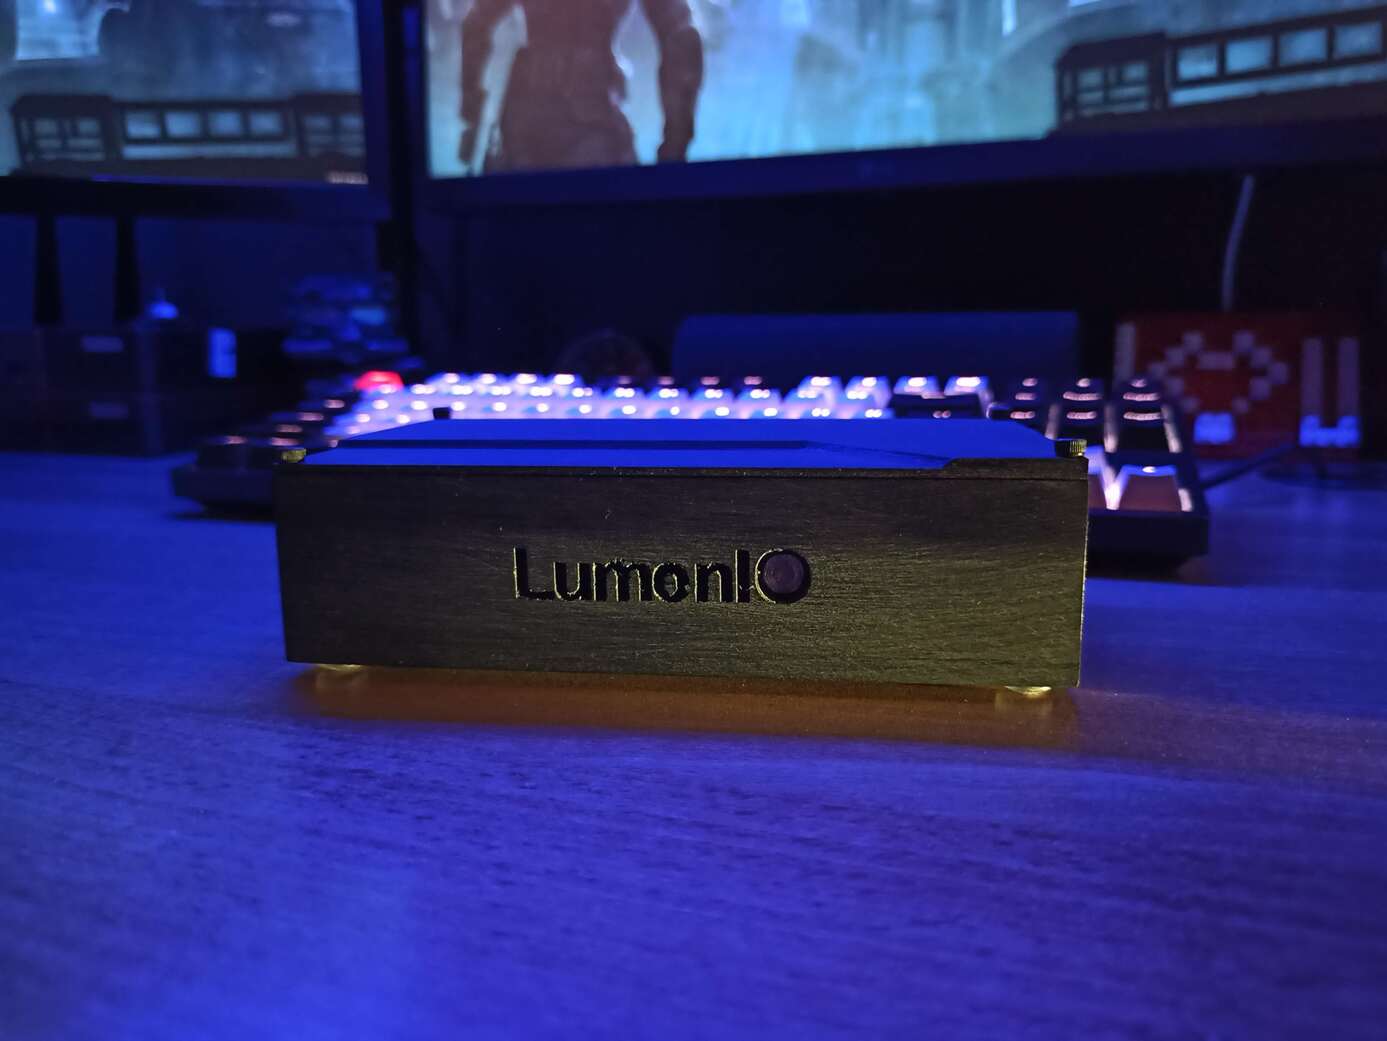
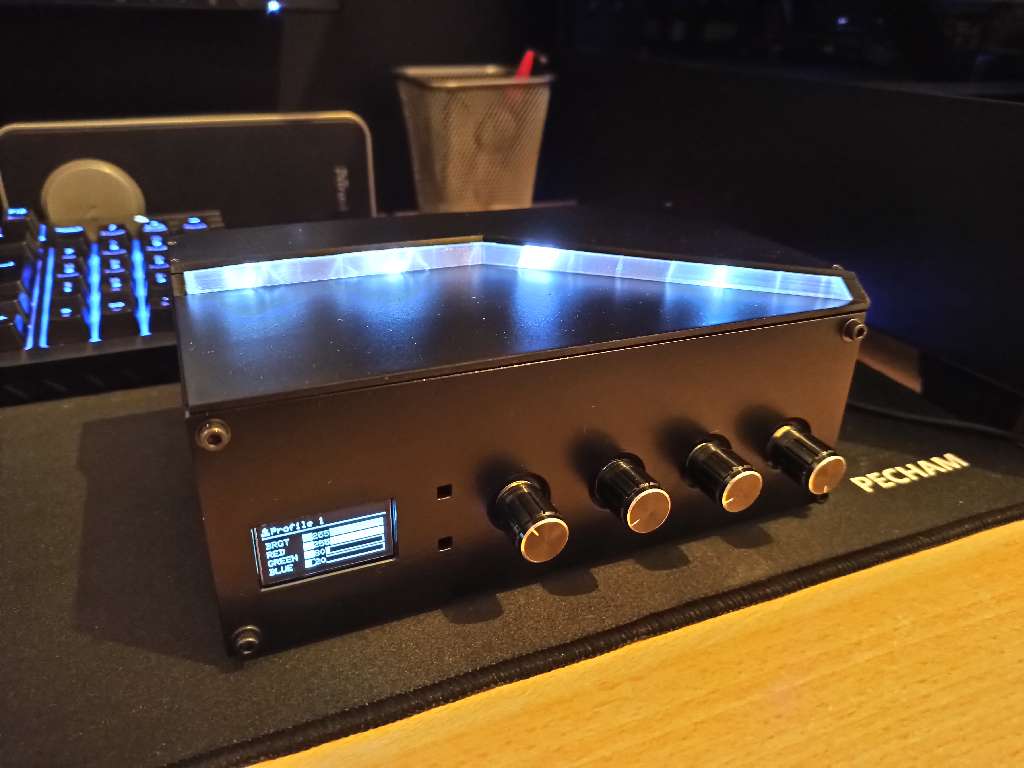
Case
The case is smaller than the previous version, thanks to fewer number of input and output components. I chose the black color, designed and printed by myself with base and lid. To close the lid I’m using 4 M3.5x7mm screws.
| Name | Type | Size |
|---|---|---|
| Base | .stl | 178 kB |
| Lid | .stl | 29,8 kB |
| LED cover | .stl | 58,1 kB |
| Project | .f3d | 339,6 kB |
Firmware
The code is smaller than the previous version, because there aren’t any buttons and rotatory encoders; only the Bluetooth connection with storing of values on EEPROM. No OOP! Only Arduino classes that are already optimized for MCU. Adding a middleware class generates delay between the RAW bytes recevided from Android application and their “realization” on LED strip; we might have another layer that performed unnecessary (storing and writiting data) operations. This GIF explains the concept of base utilization of Arduino classes.
You can check and pull the project from GitHub.
Anyway, I used PlatformIO on CLion IDE. Isn’t important which IDE to utilize; you could use whatever you want, covered by PlatformIO.
Moreover, you could change the pin numbers dedicated to RGB. The file dedicated is src/config.h. Here a portion of code:
1 | // LED strip |
Lastly, follow some guide how to flash into MCU if you want to download the firmware directly.
| Name | Type | Size |
|---|---|---|
| Firmware | .bin | 1 MB |
Middle version
Between this version and previous, there was another middle version with a LCD and LED strip indicator.
I abandoned this version because I chose to control all by Android application.
Android App
Design
Now, for design of application I tried to realize it firstly by the paper prototypes, based of features.
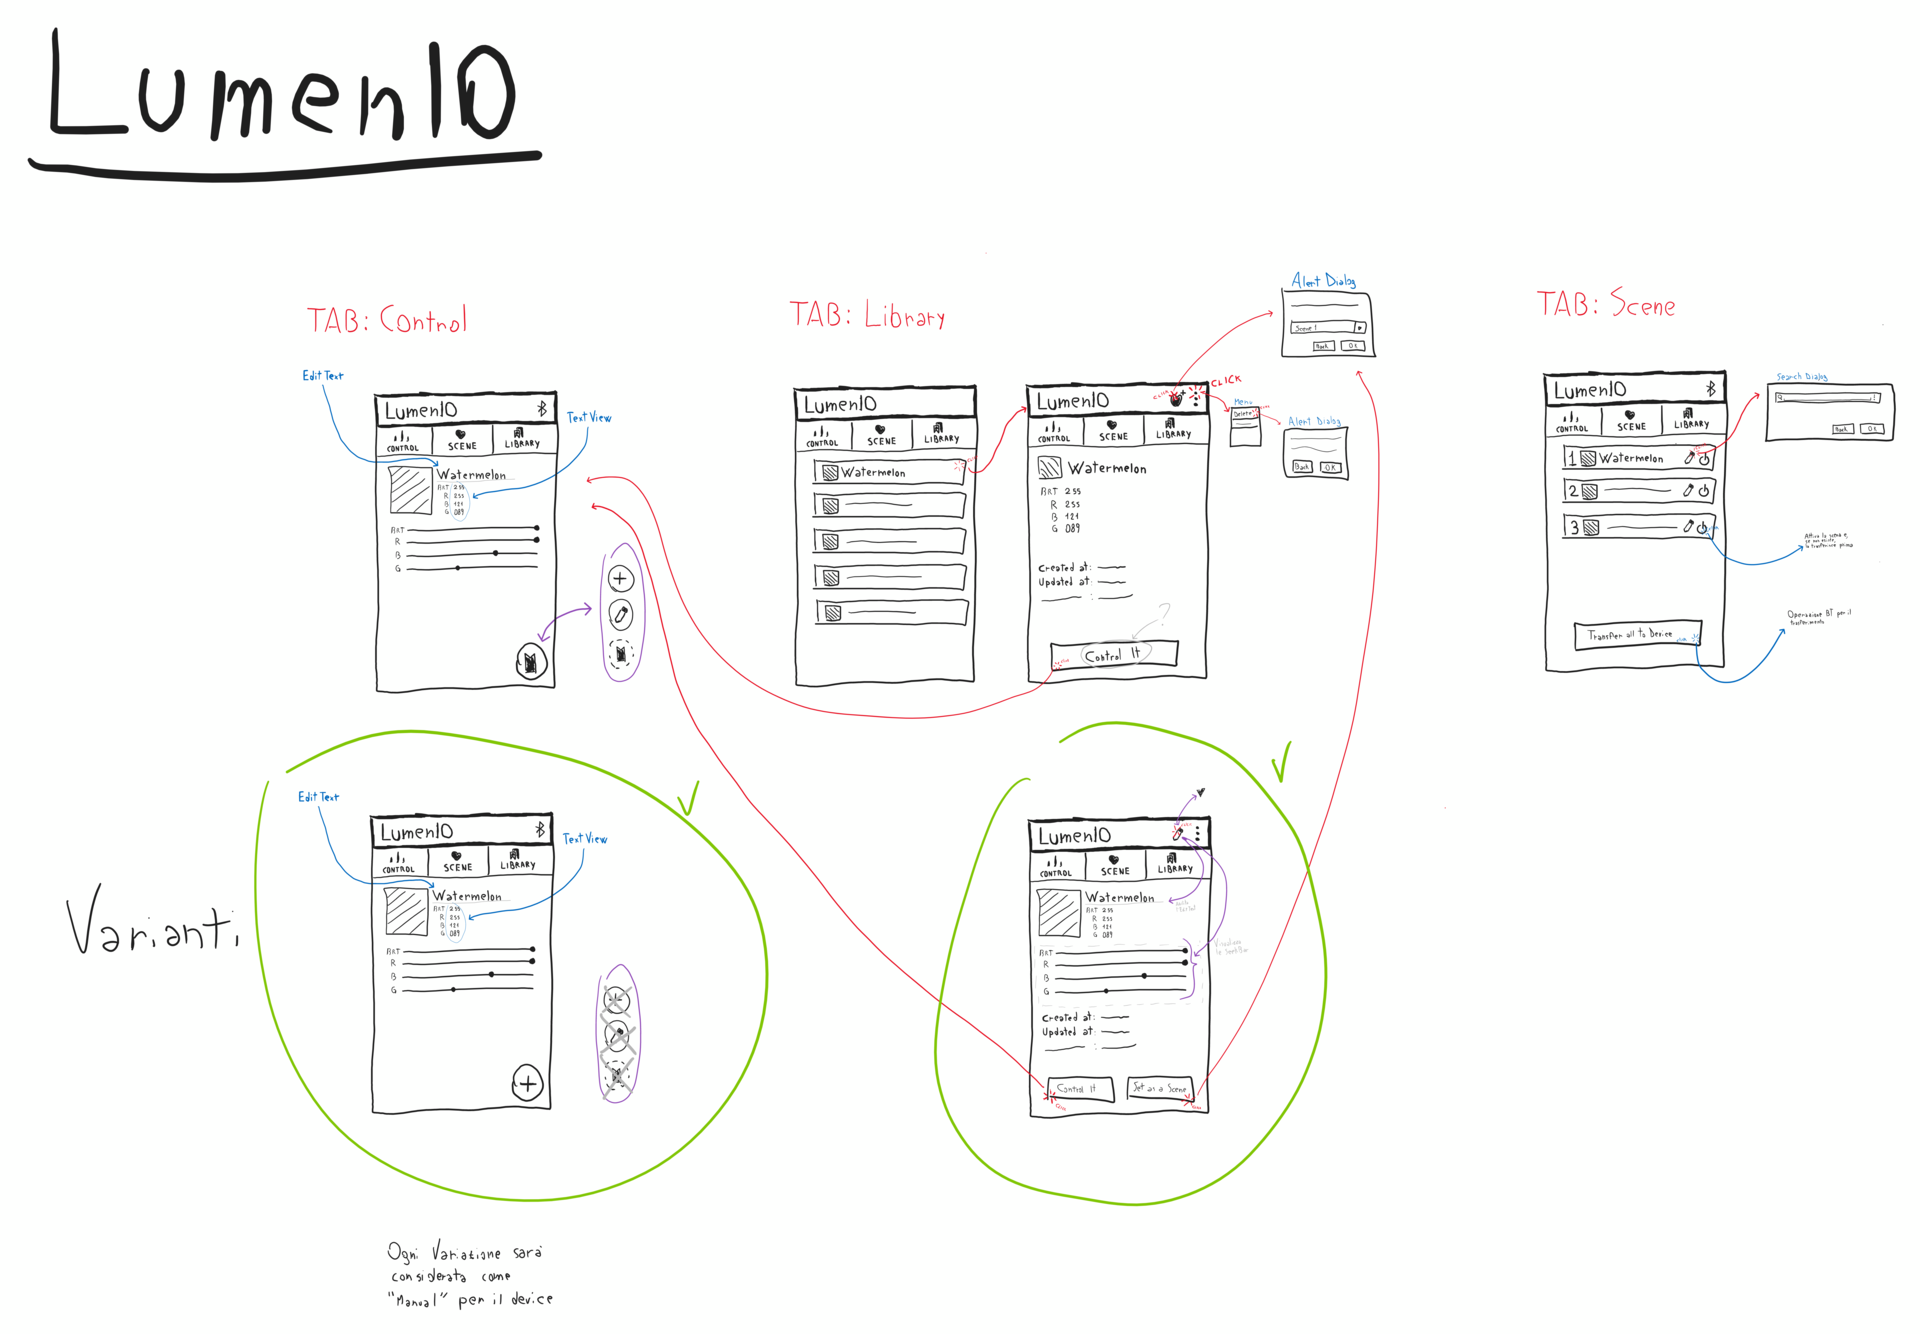
The features that I wanted for the mobile application were:
- select the device to connect;
- connect to device;
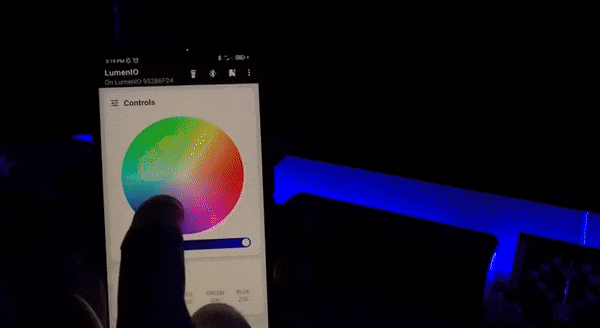
- change color IRL;
- turn on/off the light;
- save a profile in the library;
- edit/delete a profile from the library;
- run a profile from the detail;
- import/export a library;
- create/edit/run a scene.
Final result
The final result is a little bit different from the prototypes, but their realization were needed for the real implementation.


Fot this realization I had the opportunity to study Room and Bluetooth communication.
You can check and pull the project from GitHub, or can download the application directly; is already signed.
| Name | Type | Size |
|---|---|---|
| Android application | .apk | 14,4 MB |
Conclusion
I’m satisfied about the result. Maybe I had to write the Android application in Kotlin instead Java. I’m secure that I’m going to add a spinner during the connection with the device.
Thank you for reading this article!